We're now ready to prime and charge some brass! As we get started, double check your data AND primers you're using. As a general rule of thumb, only have the primers you are using for THAT load on the bench. We won't get anything messed up that way.
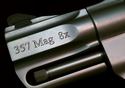
As we prepare to prime our brass, let's look at our primers. I am using Winchester Small Rifle (WSR) primers......

They come with the shiny side up, in the picture, you see the bottom turned up. That's where the "anvil" of the primer is and the priming compound underneath.
Priming-
We are gonna need our priming tools now, along with our brass......

I use a Lee hand primer on my reloading, I can feel the primer seat in better and have more control of the operation. There are bench and press mounted priming tools out there. Personally, I like the hand primers better.
Using the correct shell holder for the round we are loading, it'll go in the top of the hand primer I am using......

Next, we take our primers and place them in the priming tool tray (big blck circle on the tool). Some will land "anvil" side up, some won't. Give the hand primer a gentle shake side to side. This will "right" the primers "anvil" side up.....

After we have our primers in our tool, we can place the cover on the tool. It'll keep us from spilling our primers, I left mine off for the post here.
Let's prime! Take a piece of brass and slide her in the shell holder. Do not look down the neck of the brass!! Primers are very powerful and looking down through the neck could cost you one, or both eyes should one go off during this process!! Eye protection is a GOOD THING here!
With the brass in the shell holder, we point away from us and sqeeze the handle to the body of the priming tool. You'll feel the primer seat in, DO NOT force it any further!!......

Release the handle, extract the brass and Ta-Da!! Primed brass!!

Place the primed brass in your reloading tray and repeat the steps until we have primed all our brass.
Powder-
After priming, we are gonna "throw" some powder. Again, heed the reloading data you should've, at least, read TWICE! Place only THAT powder on the bench for THAT load. Insure that the powder you're using is the EXACT powder listed for the data you are using. Here I will be using IMR 8208 XBR for my loads.
NEVER EXCEED THE MAX LOAD DATA LISTED!!!!!
For the powder charging process here, I am using an RCBS Chargemaster. This until has the dispenser and scale built into a single unit. It dispenses and weighs our powder charge at the same time.......

When we settle on a charge weight for our powder and bullet combo, we input the charge weight into the Chargemaster and "throw" a charge of powder......

For this load, I am using 21.8gr of IMR 8208 XBR. When the cycle is complete, we pour the powder gently into our primed case via a powder funnel......

I visually check each case to insure it is charged, afterwards, I simply place a bullet on top of the cartridge. This way, I know it's charged and move to the next one......

Once we have our powder charge in the case, we'll have to seat our bullet in the case itself, we'll cover that in our next section.......We've about got our "calf licked over" now!